
Adjust/Transfer
The following section describes the inventory adjustment process within ShipHawk WMS.
Inventory Adjustment Processes
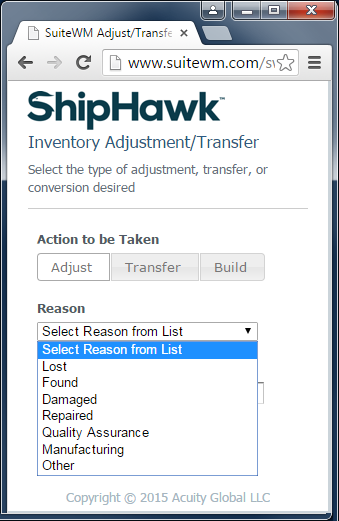
ShipHawk WMS supports three key adjustment processes:
- Inventory Adjustment
- Inventory Transfer
- Inventory Build/Unbuild
An Inventory Adjustment adds or subtracts inventory quantity of a specific item, in a specific status, in a specific bin. These are posted as Inventory Adjustments in real time to the ERP (NetSuite). Adjustment types and accounting codes are defined in ShipHawk WMS using the List of Values table (see Administration section).
Note
A cycle count is not an inventory adjustment. Rather, an “accepted” cycle count will create an inventory adjustment for the variance of the count, but ONLY if the count is “accepted” by an authorized operator
An Inventory Transfer moves a specific item, of a specific status, in a specific bin to a new physical location, OR, to a new status in the same physical location. There is no loss or gain of inventory value relating to a transfer. These are posted as Inventory Transfers in real time to the ERP (NetSuite)
An Inventory Build creates assemblies (or disassembles components) from an item that can reside in inventory as an assembly or it’s Bill of Materials components (referred to as an Assembly Item in NetSuite).
Operations & Usage
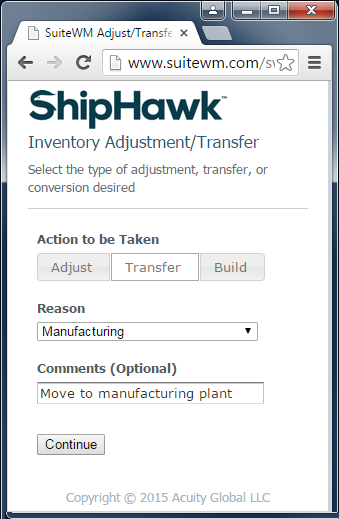
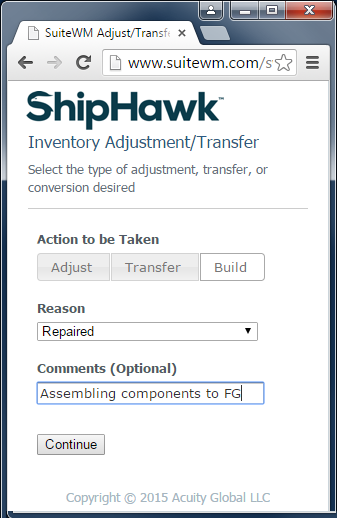
To begin, the operator select the type of adjustment desired as discussed above (Adjustment, Transfer, Build). For each type of adjustment, a reason code may be entered (see Administration Section on setting up Reason Codes and related attributes).

Each Reason Code is pre-configured to use a specific G/L Expense Account within the ERP, if desired. An optional comment is also available which will be posted with the adjustment in the ERP.
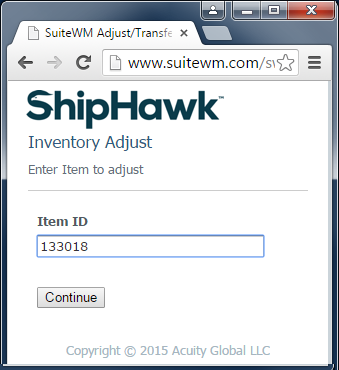
Adjustment
Once an Adjustment is selected, reason code entered, and comment set, the next step requires the entry of an Item ID to adjust.
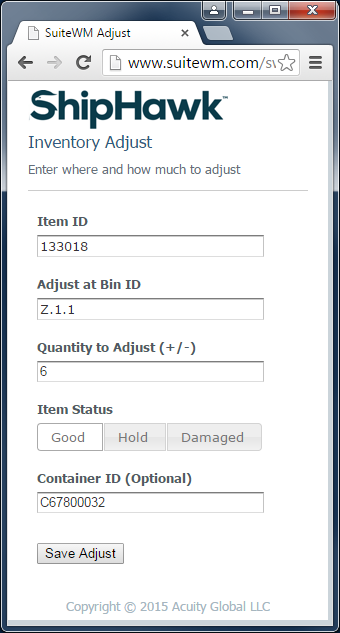
Next, the bin, quantity, and status to adjust is entered (using a “negative” sign for reducing inventory). An optional Container ID can be set for this adjustment as well.
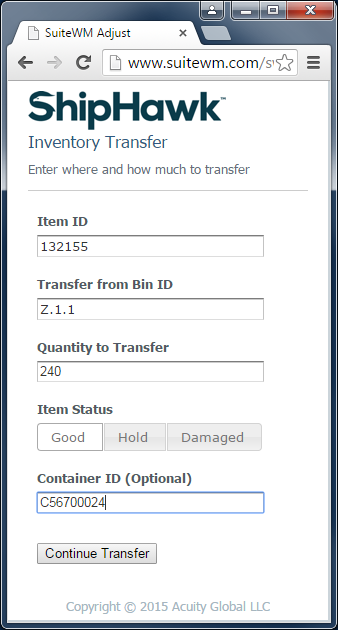
Transfer
Transfers start very similar to adjustments. The operator must first enter the reason and optional comment.
The item to transfer is then set.

The operator will then select the bin to transfer from (current location) and the quantity to transfer. An optional Container ID may be identified if desired.
Then, the process shifts to identifying the transfer “to” attributes. These include the new physical site, status of inventory, and the bin to be set at that site.
Note
This feature is also used to transfer inventory from one status to another within the SAME site.

The operator selects “save” and the transfer is processed in real time and posted to NetSuite (or ERP) as an Inventory Transfer transaction.
Build
Like the other processes defined above, a Build (or Unbuild) starts with a reason and comment. The Reason Code entered will be pre-configured to use the proper G/L Expense Account Code in the ERP.
An item is then identified to either be assembled or disassembled.

The quantity and target bin is identified and the transaction is then processed. The result will create a Build or UnBuild transaction in NetSuite (or ERP).